
Manage Business Accounts
As an admin user, you can view and manage Business Accounts on Foxtrot.
To view business users, navigate to the Client Users page in Foxtrot. The client user page will contain additional fields for business users such as role, the linked business account, the lead capture information, etc.
To view business accounts, navigate to the Business Account page in Foxtrot. The Business Accounts page in Foxtrot is where an admin user can manage a locked/by invite micro-site for corporate purchases.
Business Accounts: List View
- Only businesses that fill out the B2B lead capture form will show in the list view. This is because if they don't fill out the lead capture form we will not know the name of their business.
- If a user does not fill out the lead capture form, their business account can be accessed under the User Details tab of the Client User page.
Create Business Account: User can manually create a business account by clicking the prompt in the top left. User will need to set up all details of the business account.- User can search by Business Account
Name- Search is case sensitive
- To view details and settings of a Business Account, user will need to click into the specific account.
Business Accounts: View Business Account
Account Details
-
Name: The name of the business. Will auto-populate with the Business Name entered on the lead capture form. -
Vanity Slug: This is the specific URL that will take corporate users to a special log in screen for their business portal. This will only work if custom login is enabled.- This needs to be added manually by an admin user
- This is typically used for businesses with Limited Variants
-
Account Owner: Will default to the user who registered to the business account. If manually creating a business account admin user can search by email and add an owner. -
Shipping Label Profile: Default- This field can be ignored
-
Limited Variant Selection:This can be checked if a business wants to limit the variants their members can purchase. If this is checked, the eligible variants to purchase will need to be added under variants. Businesses with limited variants will have a "portal" experience where they can only access a page of eligible items. They will not see the navigation or any other pages.- This needs to be set up by an admin user
-
Display Web Banner Interstitials- This controls if the business account members can view banner interstitial messaging on web. Businesses may want to prevent this if the account can’t participate in global promotions.
- This will default to checked for Business Accounts generated through account registration.
-
Able to Participate in Promotions:- This controls if the business account members can checkout with promotions.
- This will default to checked for Business Accounts generated through account registration.
-
Able to Use Promo Codes:- This controls if the business account members can checkout with promo codes.
- This will default to checked for Business Accounts generated through account registration.
-
Able to Use Credits:- This controls if the business account members can apply credits at checkout.
- This will default to checked for Business Accounts generated through account registration.
-
Sign Up Credit Bonus- Defaults to 0. If an amount is added, that amount will be added in credits to each new member of the business that is added.
- Any credit other than 0 needs to be set up by an admin user
- Only applicable if credits are enabled for your organization.
- Defaults to 0. If an amount is added, that amount will be added in credits to each new member of the business that is added.
-
Discount: Defaults to 0. If a discount is added here, the percentage will be automatically applied at checkout for all associated members of the business.- Any discount other than 0 needs to be set up by an admin user
-
Logo Image: An image uploaded here will replace the logo on the top left of the site.- This needs to be set up by an admin user. We recommend to use a white or light color logo for better contrast.
-
Able to use Custom Login:-
Check
Custom Login Enabledif portal experience should have a custom login for associated business members. -
This should be used in conjunction with a vanity slug so all members of the business account can sign in to their portal.
-
Sign in will only work for users who are a part of the business account unless
Auto Enrollis Enabled -
Auto Enroll- If a user signs in to their existing account account through the custom login screen with auto enroll enabled they will be added as a member of the business account. This will only with with existing standard accounts.
-
Login Message: The message that is shown on the custom login screen- If no login message is provided, default message is:
[Business name] Teams Up With [Org Name]!
- If no login message is provided, default message is:
-
Login Image: The image shown on the custom login screen
Below is an example of a Custom Login Screen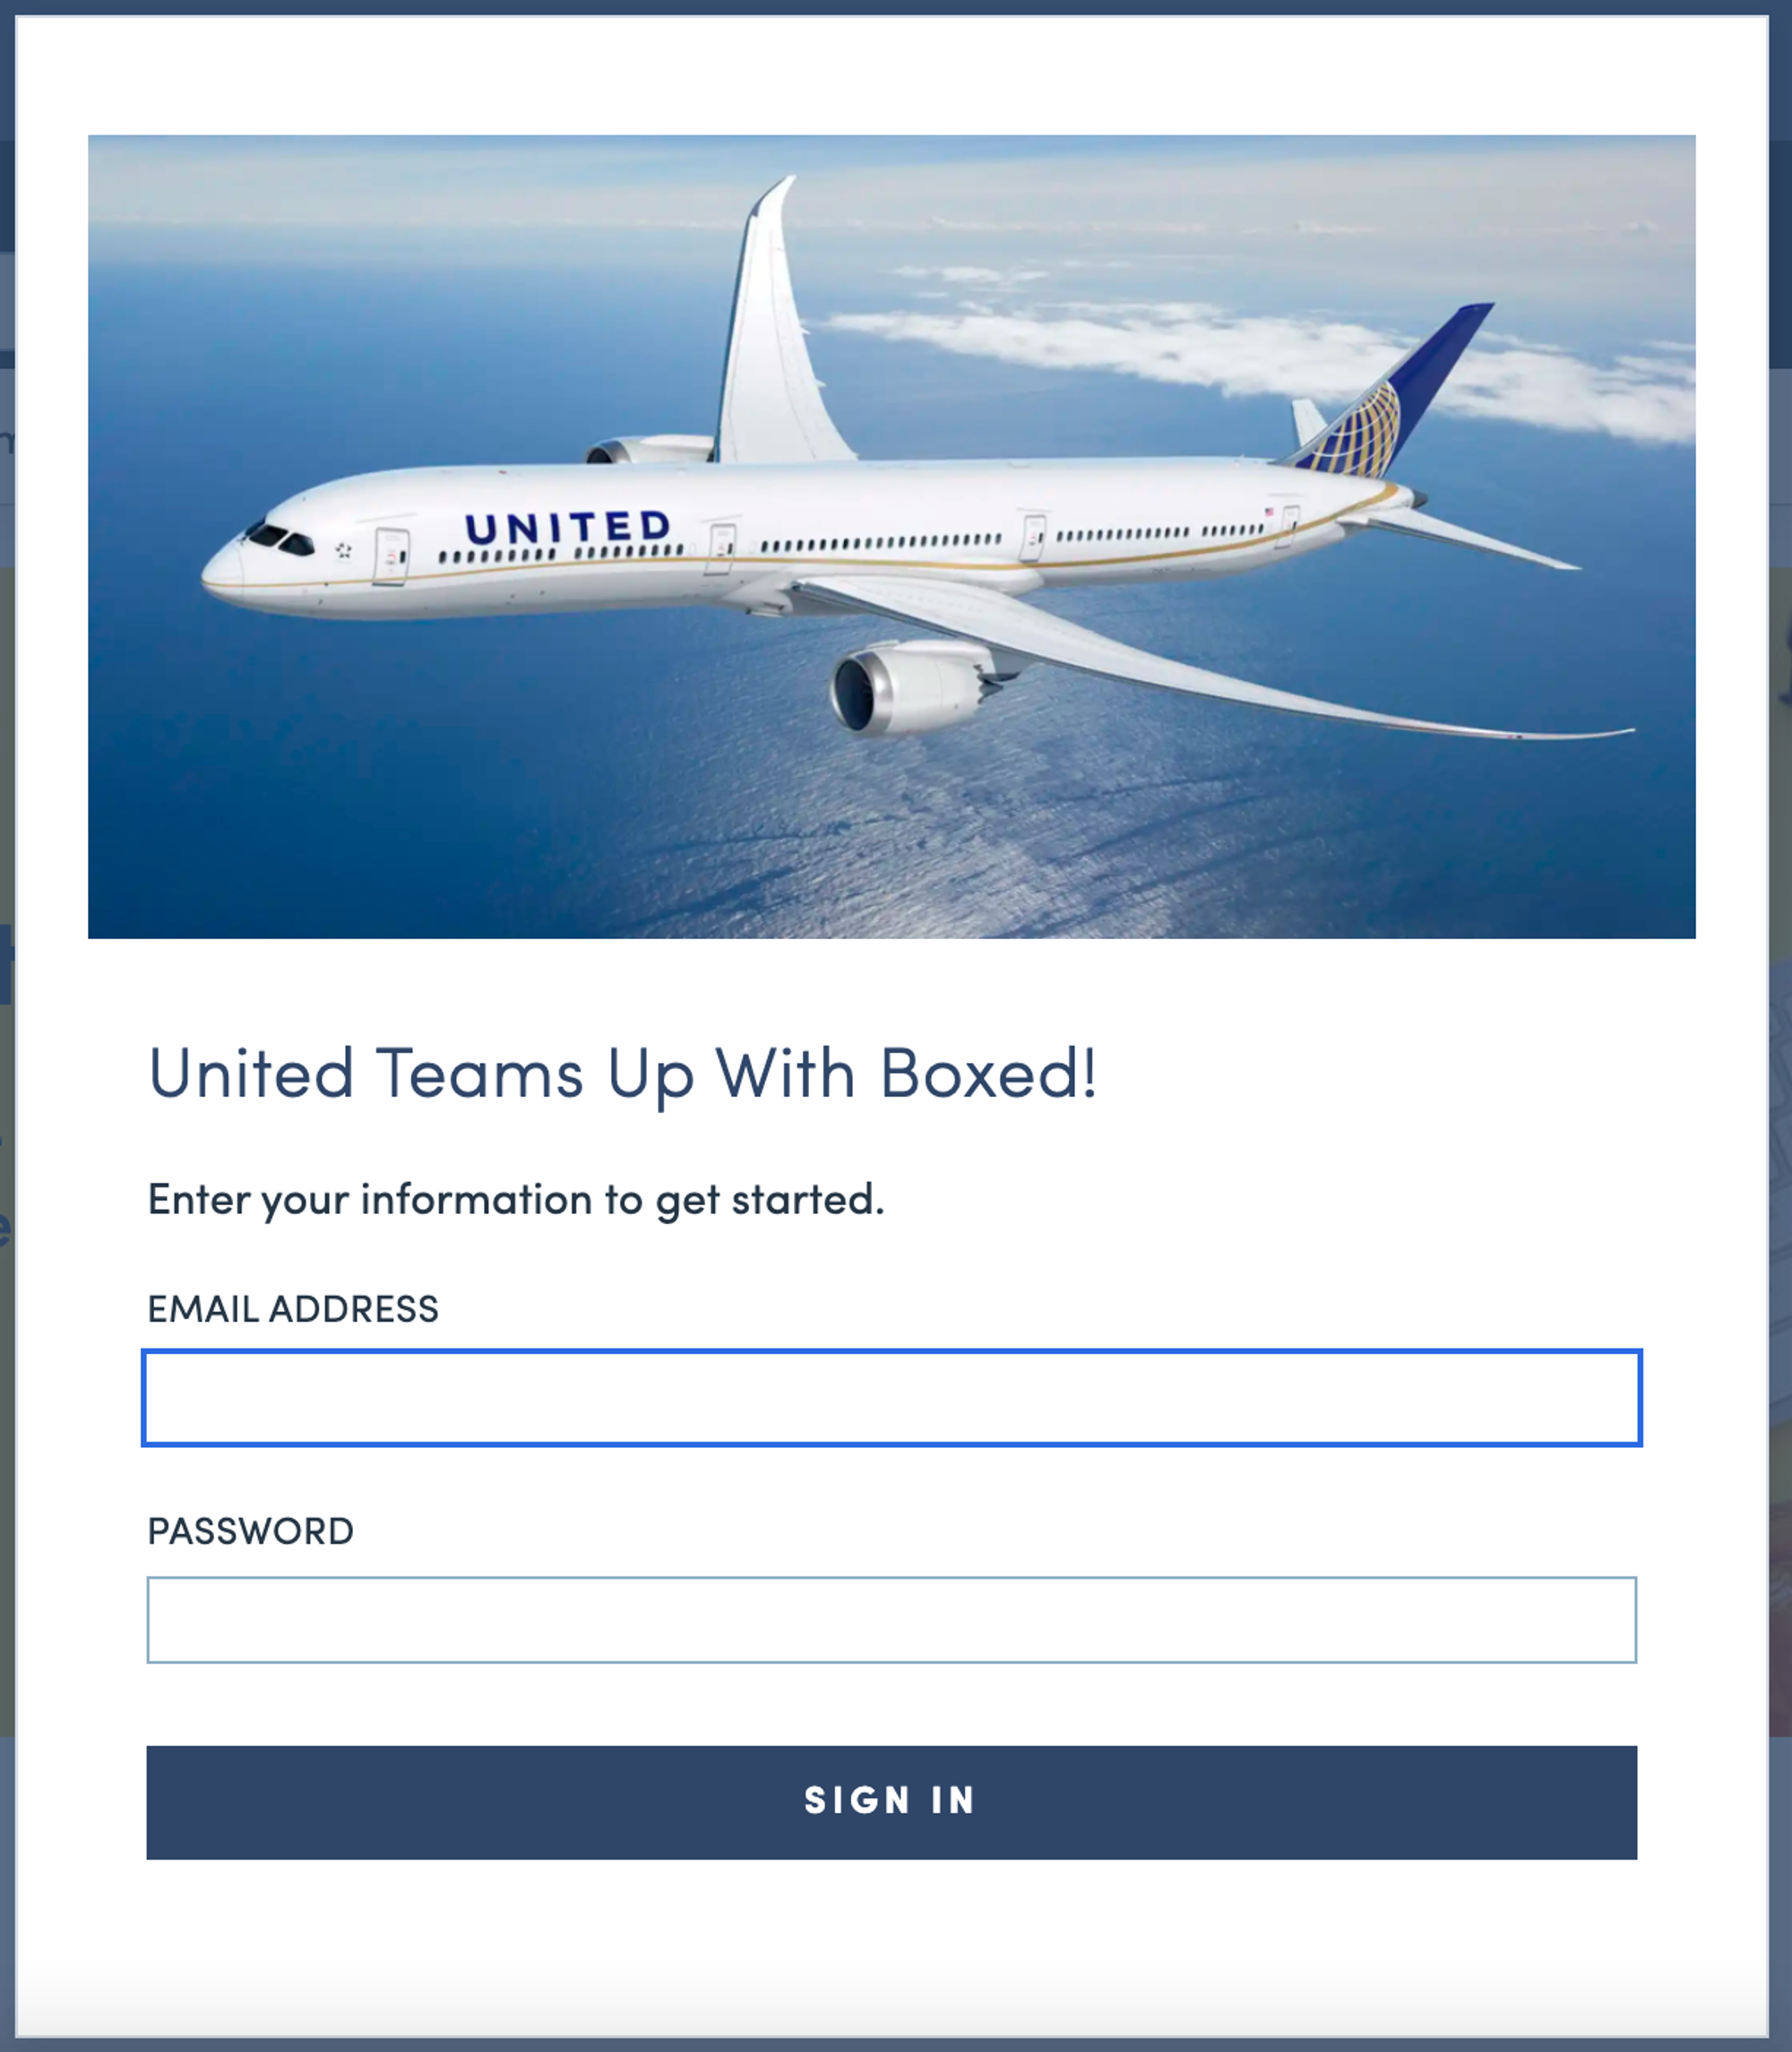
-
-
Is Tax Exempt: Tracks whether the business account is tax exempt. If enabled for your org, this will be reflected on the lead capture form.If selected, the tax payer ID and tax certificate form fields will be shown below. -
Tax Payer ID: View and update a business's tax payer ID. If enabled for your org, this will be reflected on the lead capture form and is required for registering tax exemptions in Avalara. -
Tax Exemption Certificate: CS Agents can view, change, or remove previously upload tax exemption documentation. If enabled for your org, this will be reflected on the lead capture form and is required for registering tax exemptions in Avalara.
Users
- The user's tab will show all associated members of the business account and their role (owner, member)
- Members can be removed from the business account on this screen.
- Owners of business accounts cannot be removed until ownership is transferred to another user. The transfer of ownership can happen on the Client User page by updating the dropdown option.
- Clicking on the user's email on this screen will take you to the Client User page.
- Owners of business accounts cannot be removed until ownership is transferred to another user. The transfer of ownership can happen on the Client User page by updating the dropdown option.
- Members can be added to the business account by searching for a user.
- Only user's not currently associated to a business account can be added.
- The adding and removing of members from a business account needs to be done by an admin user.
Payment Settings
Payment options:
Default: set by default for all business accountsInvoice Enabled: can be set by admin users to enable the business account for invoicing. The business account must use invoicing to pay for orders. Read more in Invoicing.Invoice Enabled + Default: can be set by admin users to enable the business account for invoicing. The business account can either use invoicing or regular payment methods to pay for orders. Read more in Invoicing.
Additional payment methods can be added through integrations.
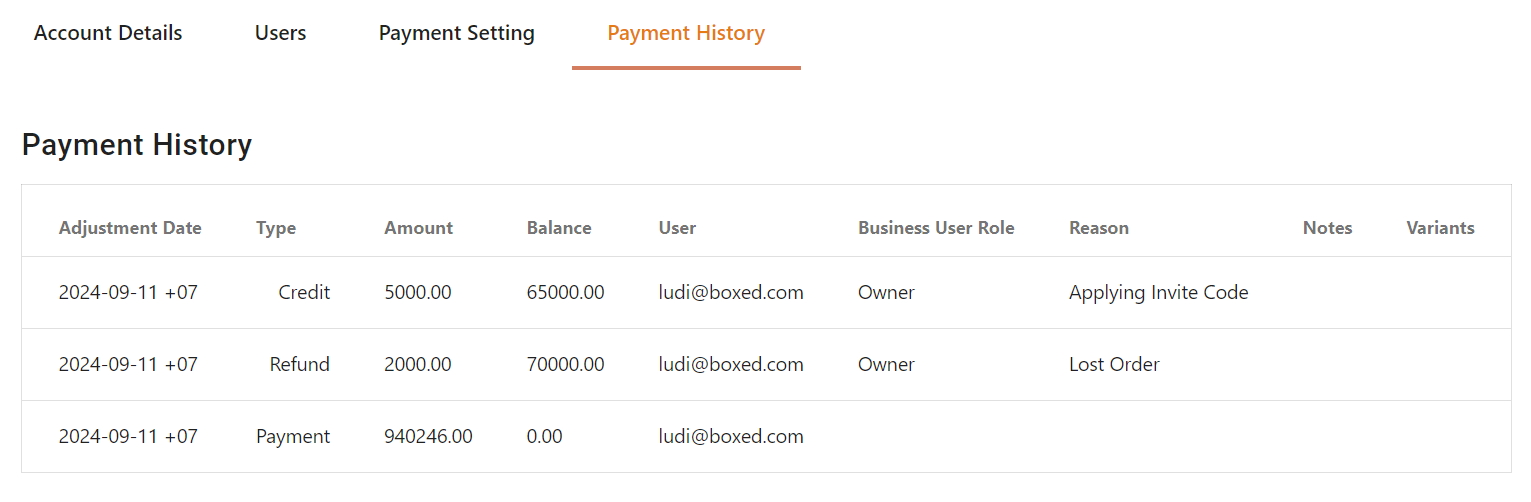
Payment History
Only applicable if invoicing is enabled for the business account.
This tab shows a history of payments, refunds and credits for business accounts set to invoicing.
Updated 5 months ago
What’s Next
All settings of a Business Account can be customized by an Admin User, which enables a Custom Business Portal.