
Picker request
Picker Requests allow worker to shop for orders. It’s the first step of fulfillment. A request can have one or multiple orders.
-
As a picker, I receive a text message when a new request has been assigned to me, when new orders are added to my current request and when I complete a request
-
As a picker, I am able to review and confirm orders assigned to me
- Go to tab
Picker Requestand refresh screen to see the request
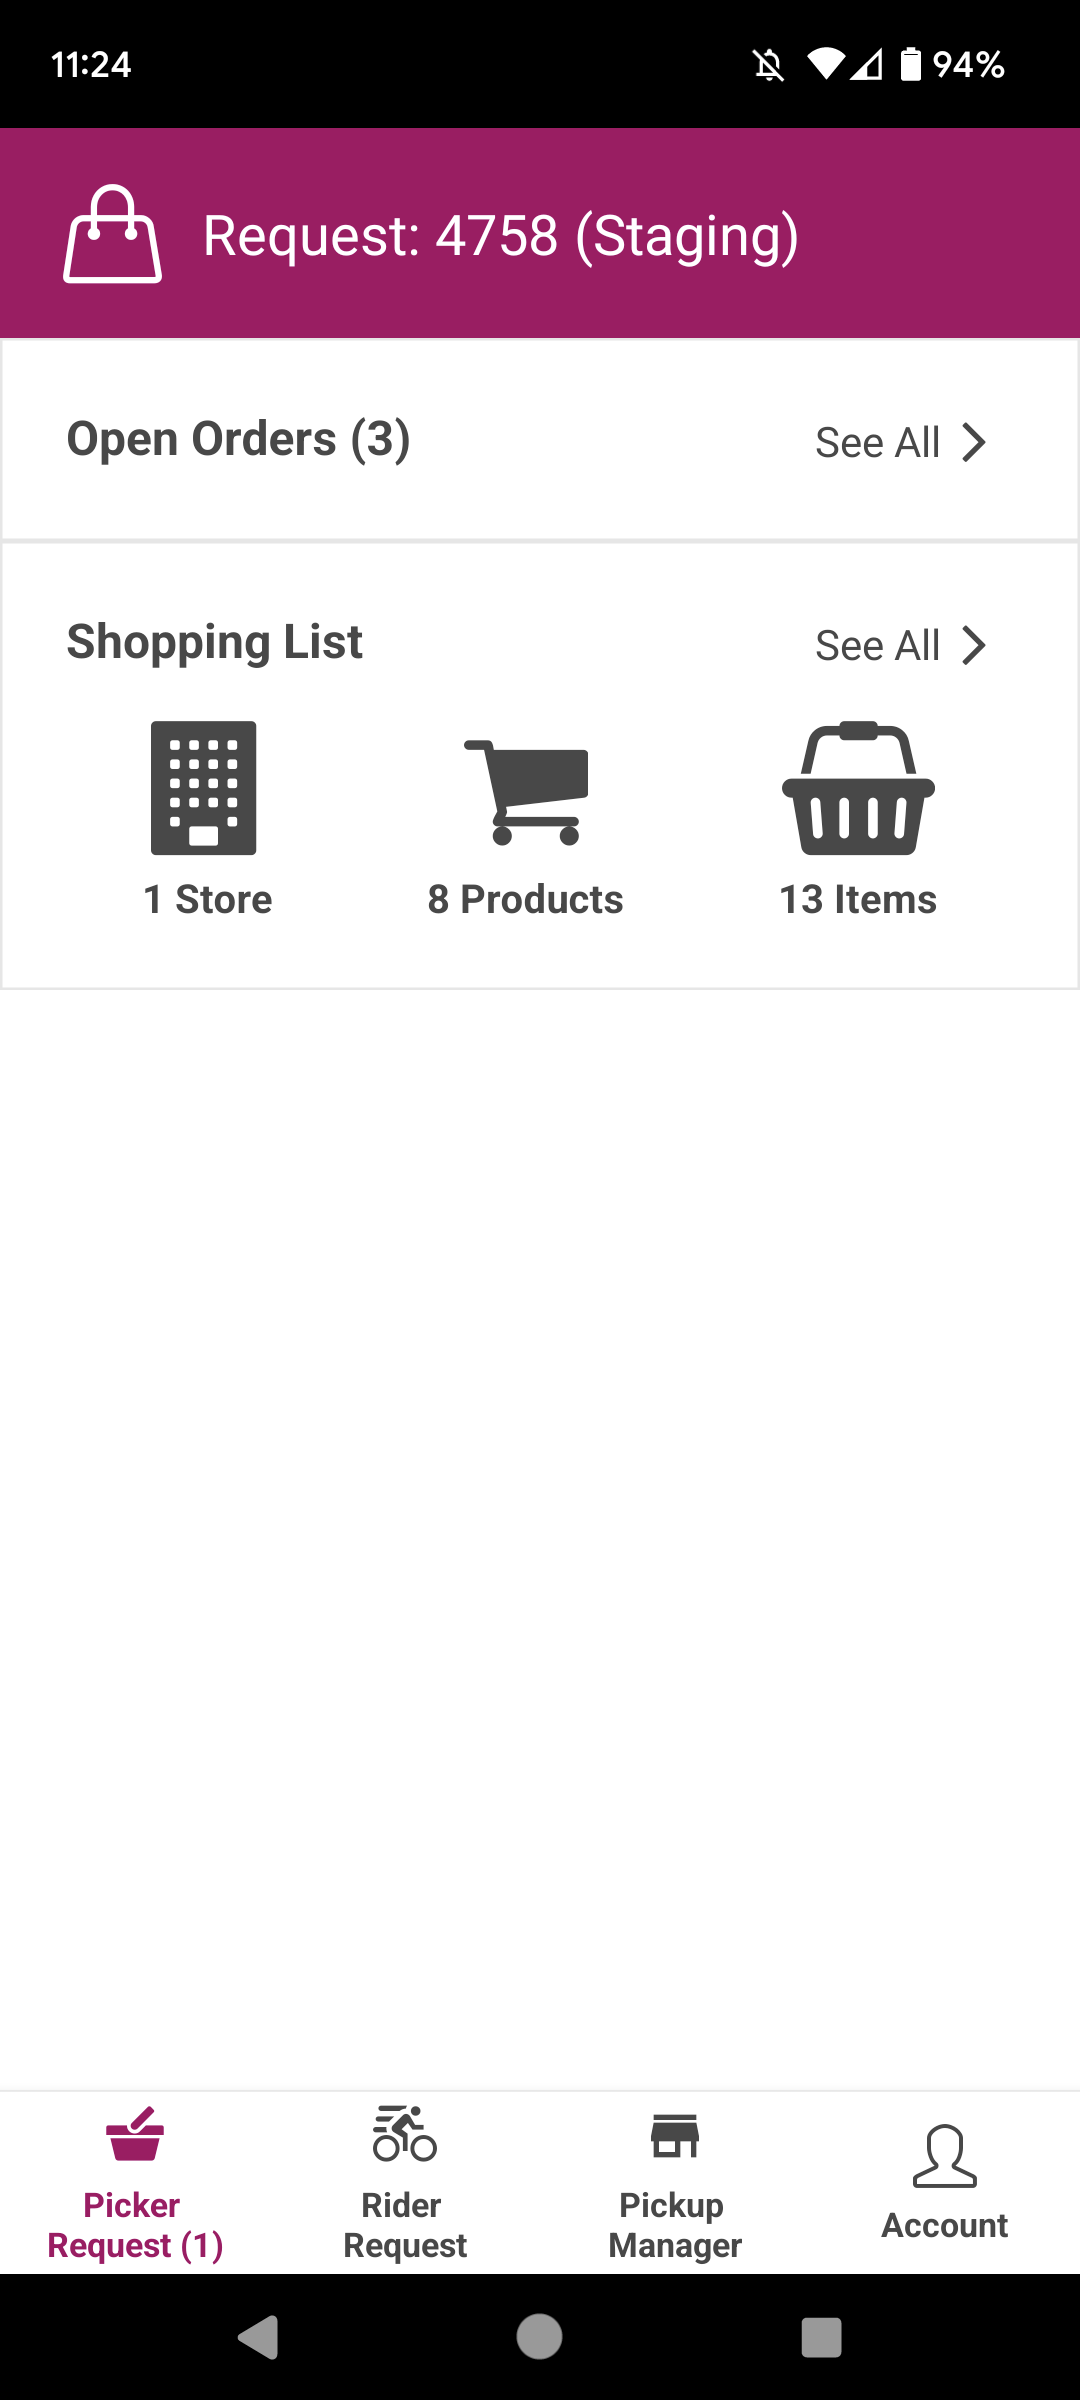
- Go to section "Open Orders" to review orders
-
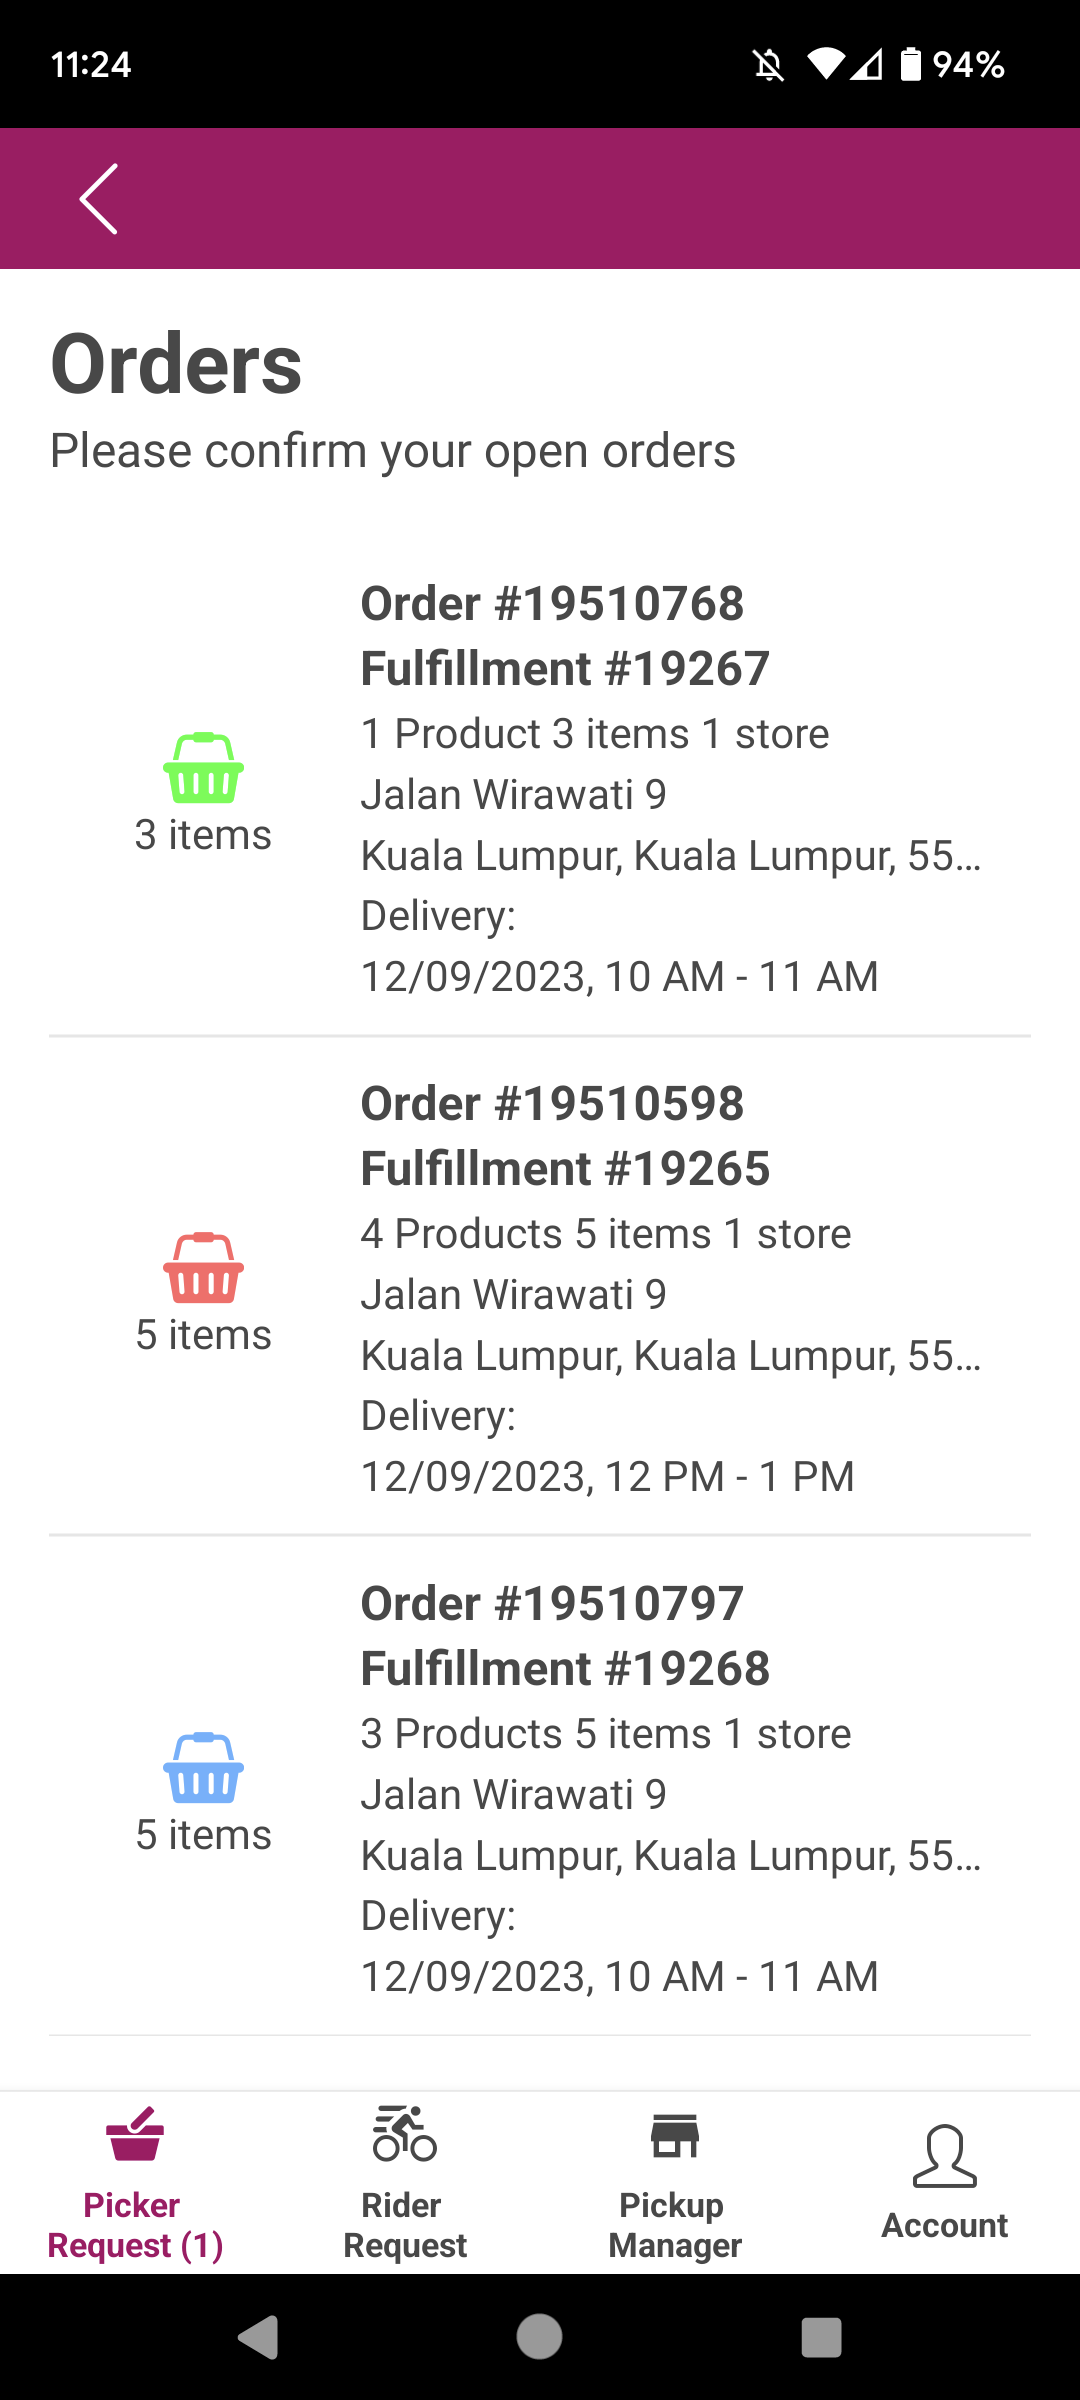
Screen displays a list of orders to pick
- Order Number
- Fulfillment Number
- Number of products and number of items
- Number of stores where items are located
- Customer address
- Order’s delivery/pick up window or estimated delivery date
- Payment due at delivery for Cash on Delivery orders
📣 Color-coded baskets are used to identify each order
📣 Comment icon will be displayed if the order has any internal notes added on Xpress Admin
-
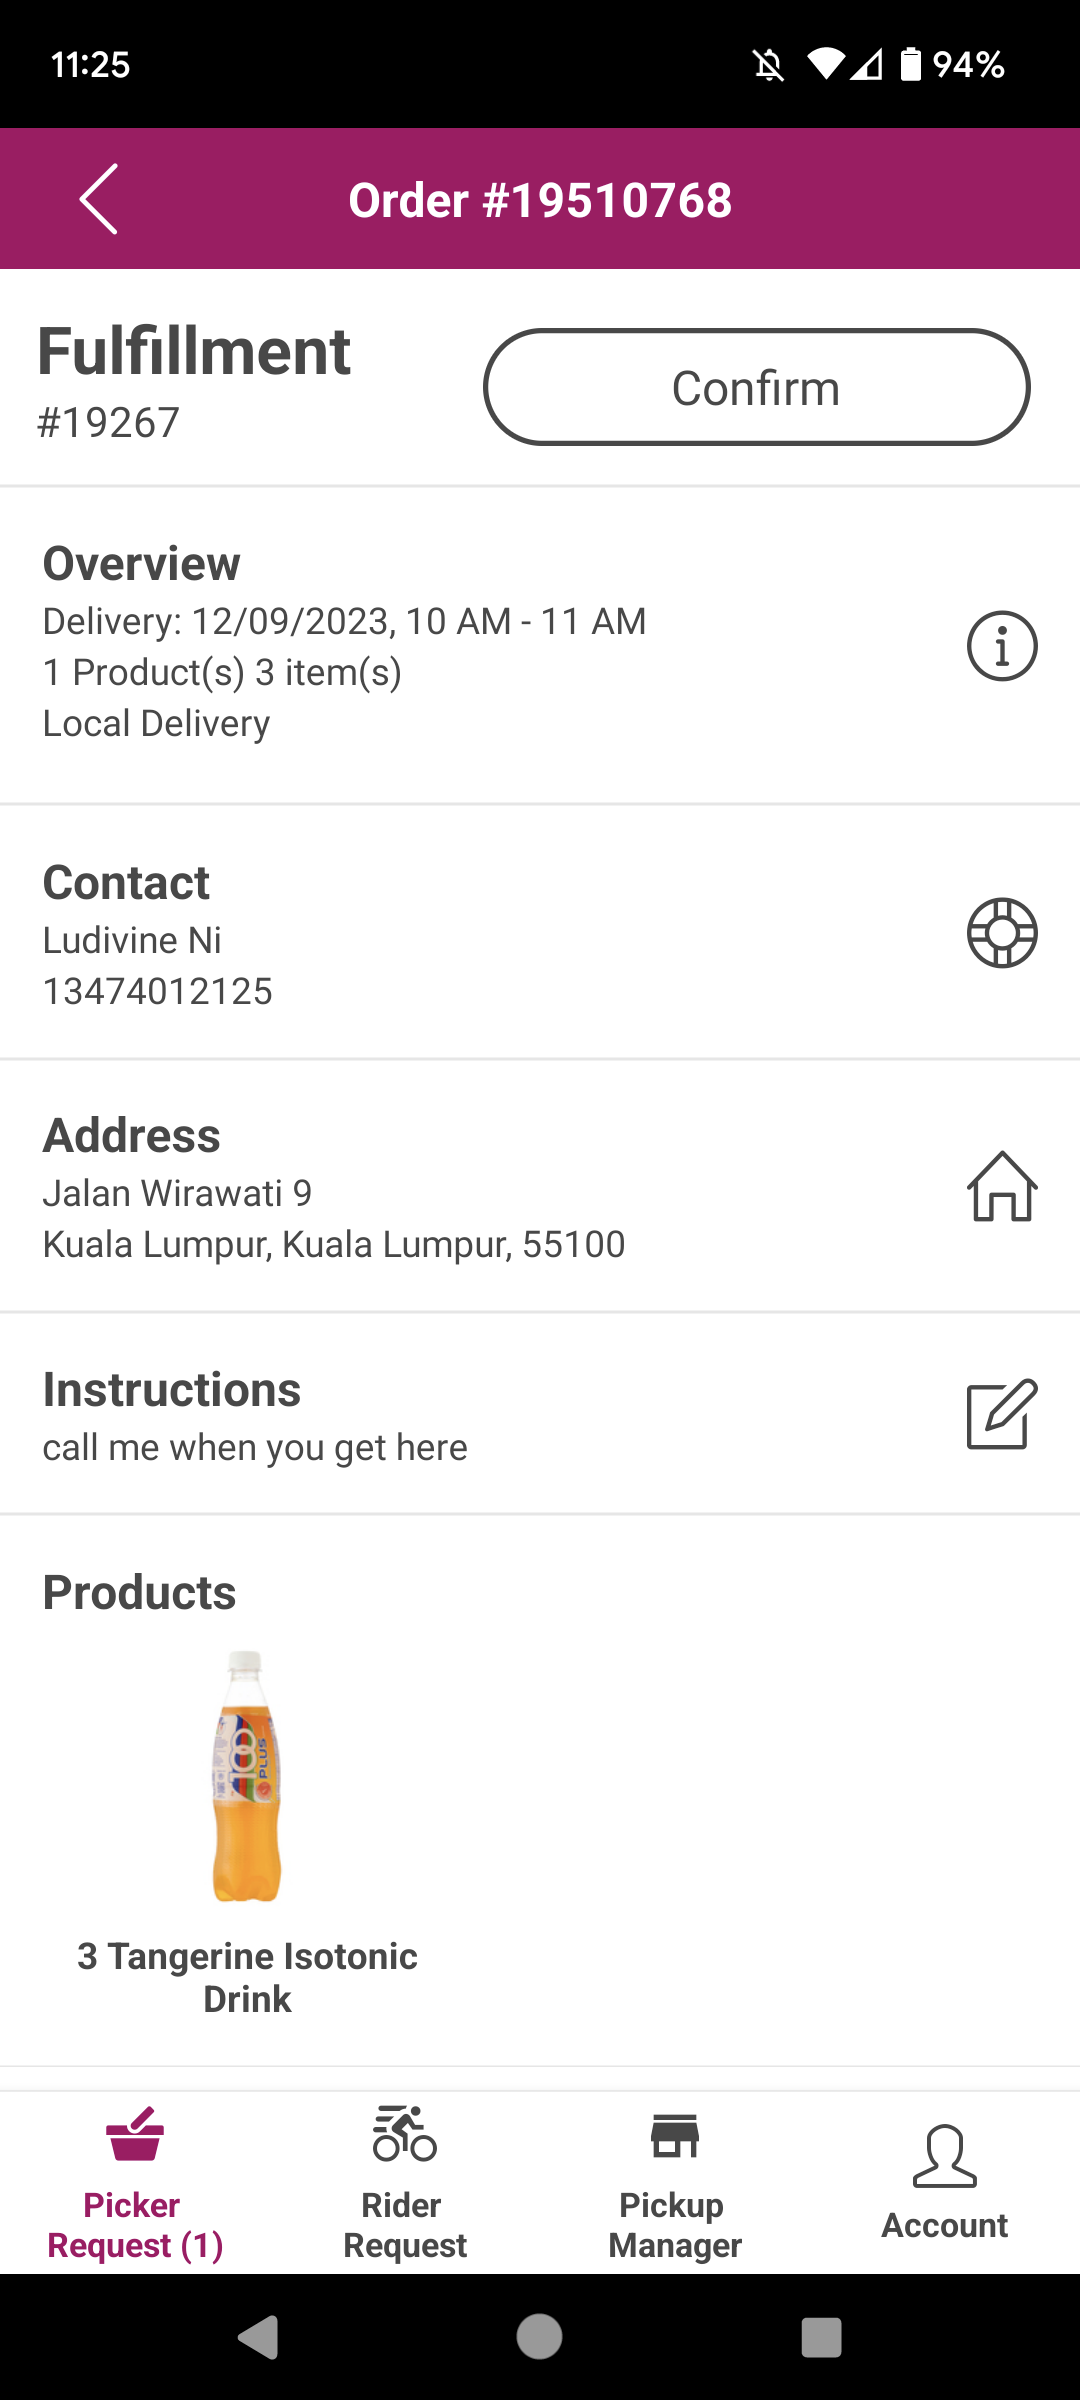
Tap on an order to view details
- Overview:
- Order’s delivery/pick up window or estimated delivery date
- Number of products (unique products) and number of items (total number of items including multiple quantities of the same product)
- Fulfillment method (Local Delivery / Pick Up / Standard)
- Stores: List of stores where items are located
- Payment Details: Only displays if order is Cash on Delivery and shows amount due
- Contact: Customer’s name, phone number and client view type (Standard or Business)
- Address: Customer’s address
- Instructions: Instructions provided by the customer, if any
- Internal Notes: Notes related the fulfillment added by internal users on Xpress Admin
- Products: Displays items in the order and quantity ordered
- Tap on “Contact” to call or send an SMS to the customer
- Tap on “Address” to open your phone’s map app and view the customer’s location
- Overview:
-
Tap on “Confirm” for each order in the request when ready to start shopping
- This will set the order’s status as
Confirmed - A checkmark will be displayed next to each confirmed order
Once all orders are confirmed, go to the next step for shopping. All orders need to be confirmed before you can start the shopping process.
- This will set the order’s status as
- Go to tab
-
As a picker, I can shop for items and indicate the quantity fulfilled
- Under
Picker Request, go to section "Shopping List"
-
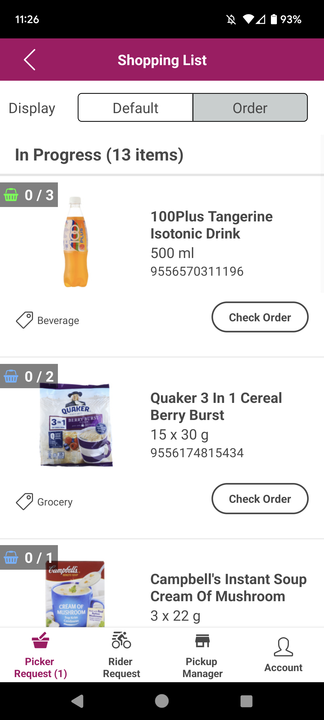
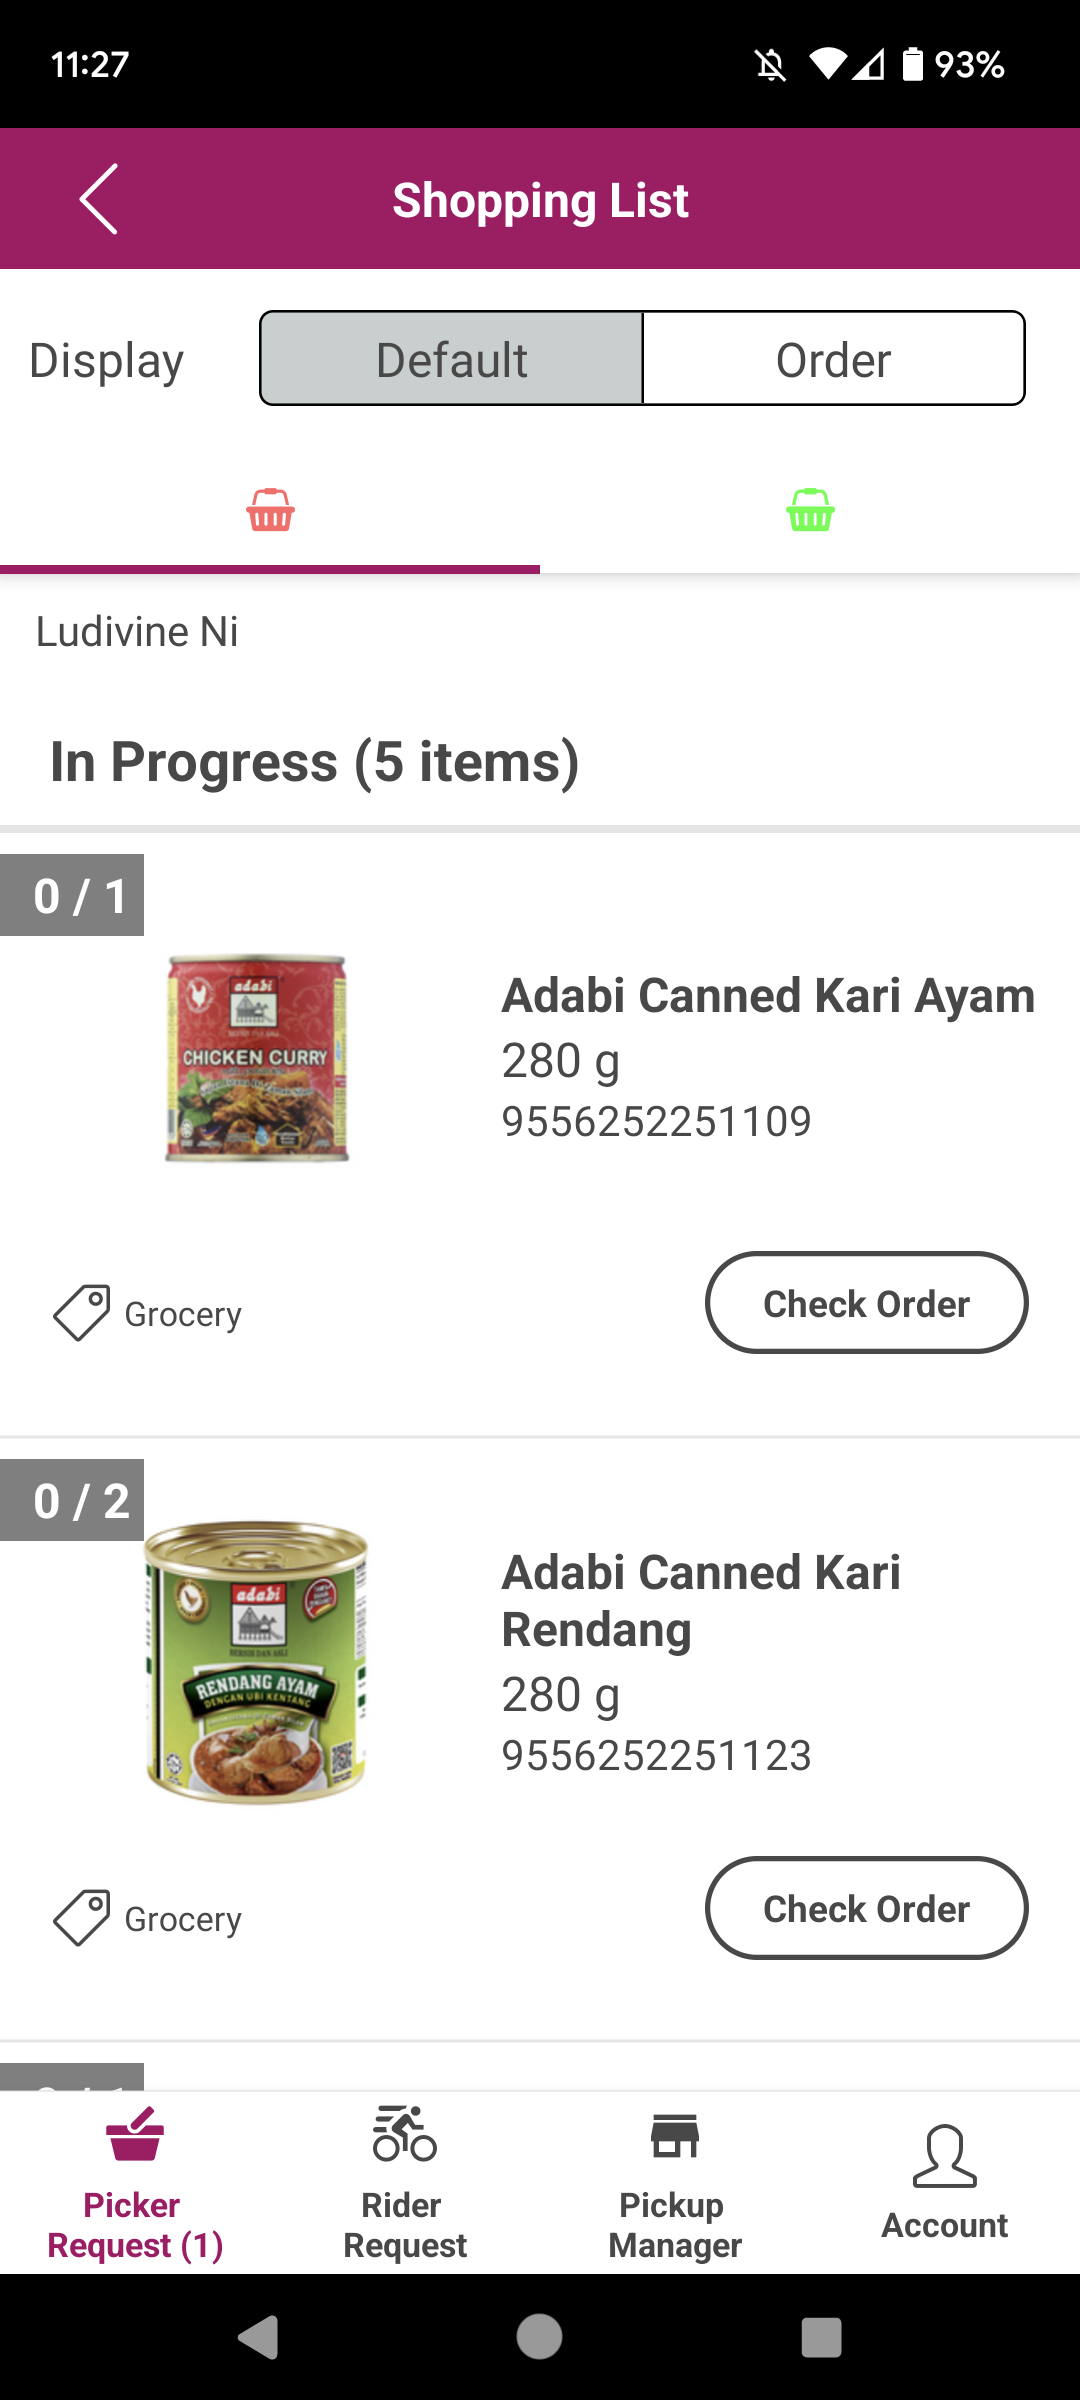
By default, screen displays item from all orders in the request, sorted by store then categories
-
List of items is broken by two sections: “In Progress” for items yet to be fulfilled and “Done” for items fulfilled already
-
To view the shopping list by Order, toggle to
Orderon the main shopping list screen- Tabs with colored-coded baskets are displayed for view by Order
-
Review information on each item row
- Item image
- Item name and extended name
- Item UPC
- Quantity fulfilled and quantity ordered
- Store where the item in located
- Category of the item (as it appears on the website/mobile app)
📣 Color-coded baskets are used to indicate the order to which each item belongs. If an item is part of multiple orders, the app will display multiple baskets to represent each corresponding order.
-
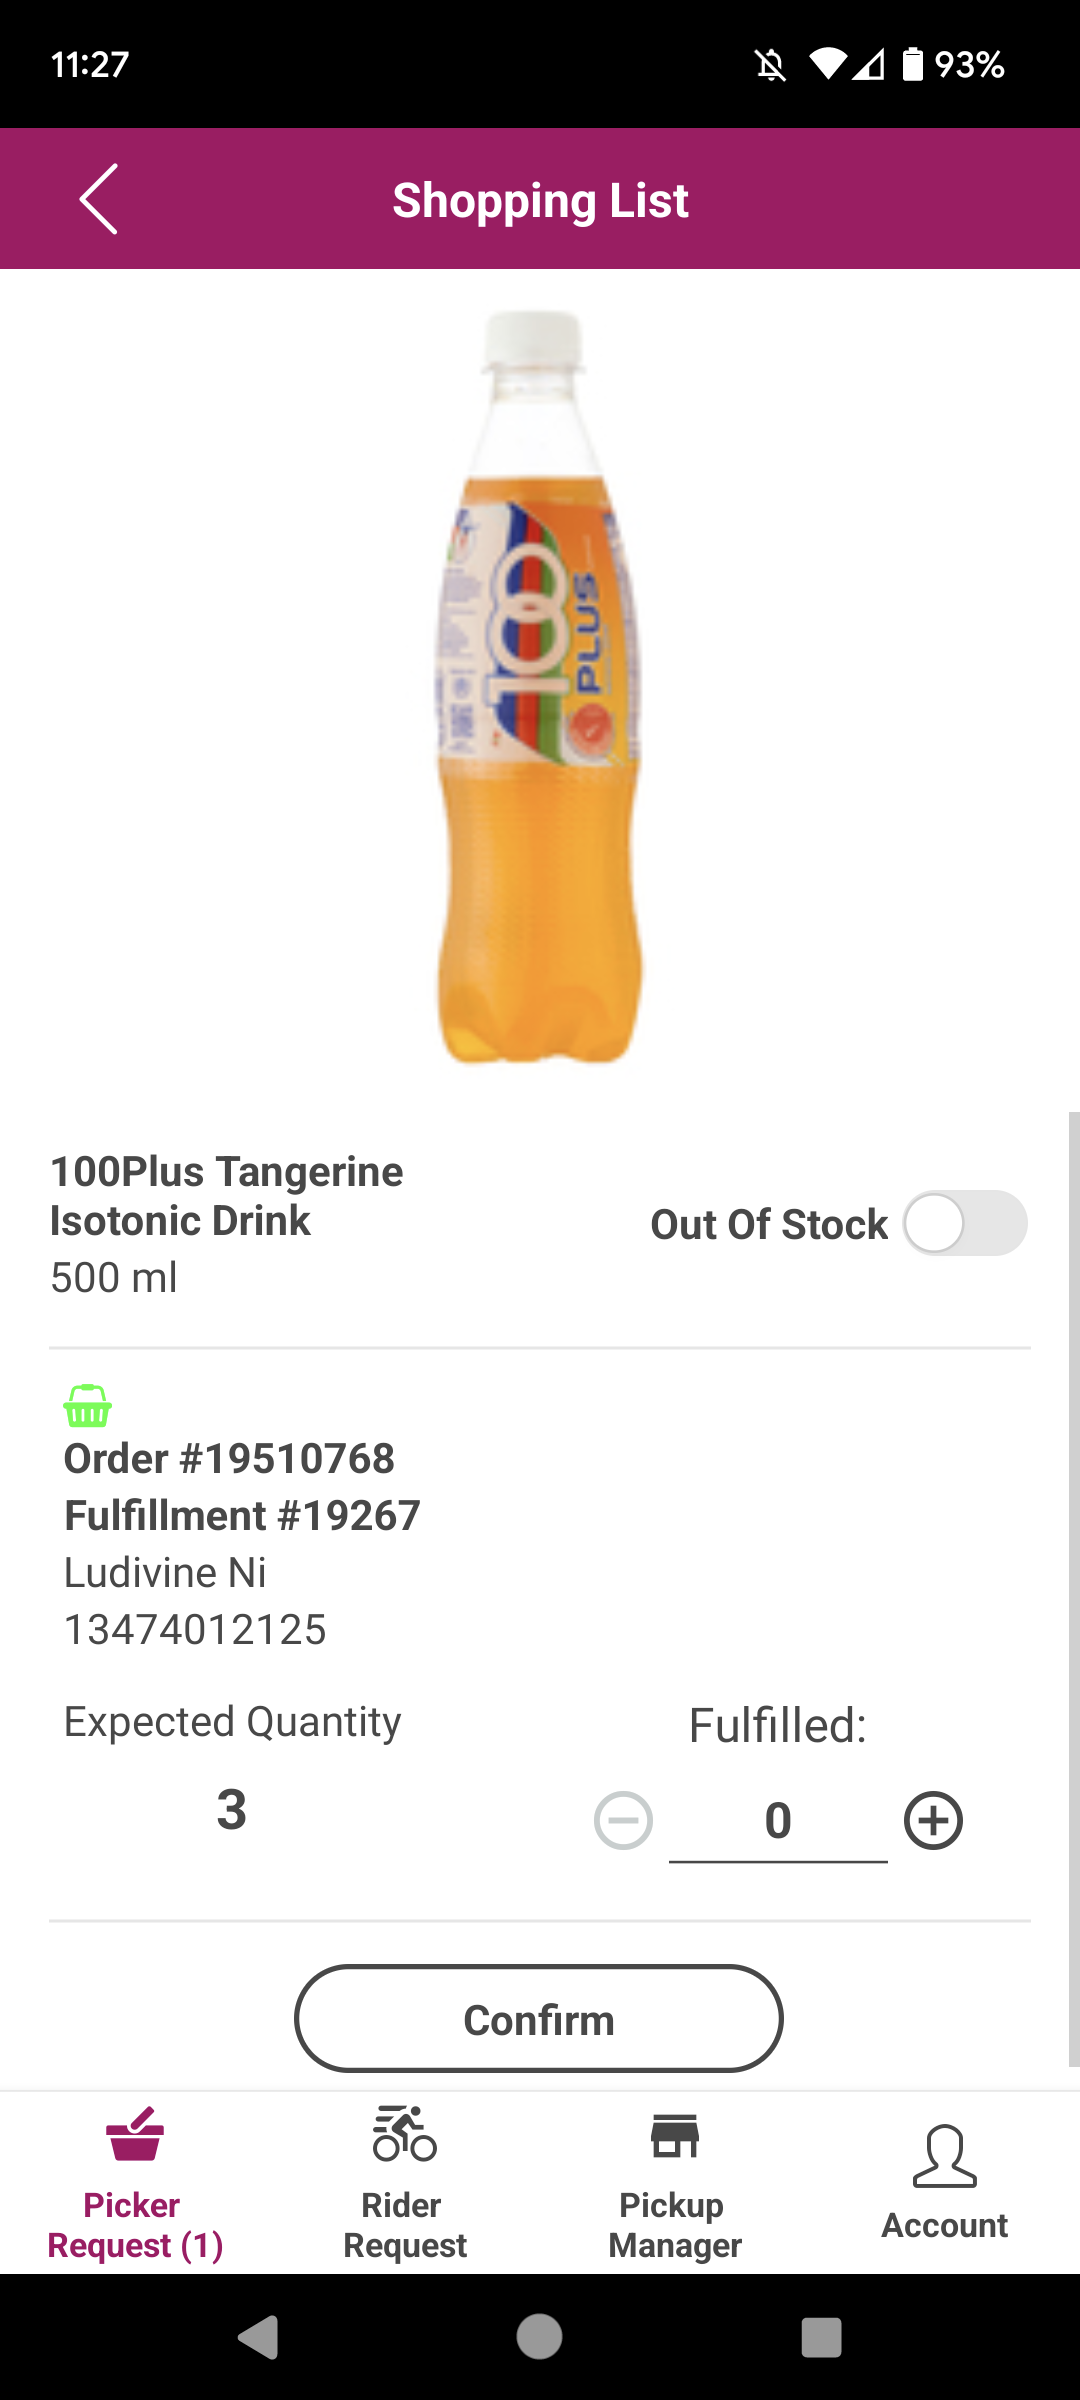
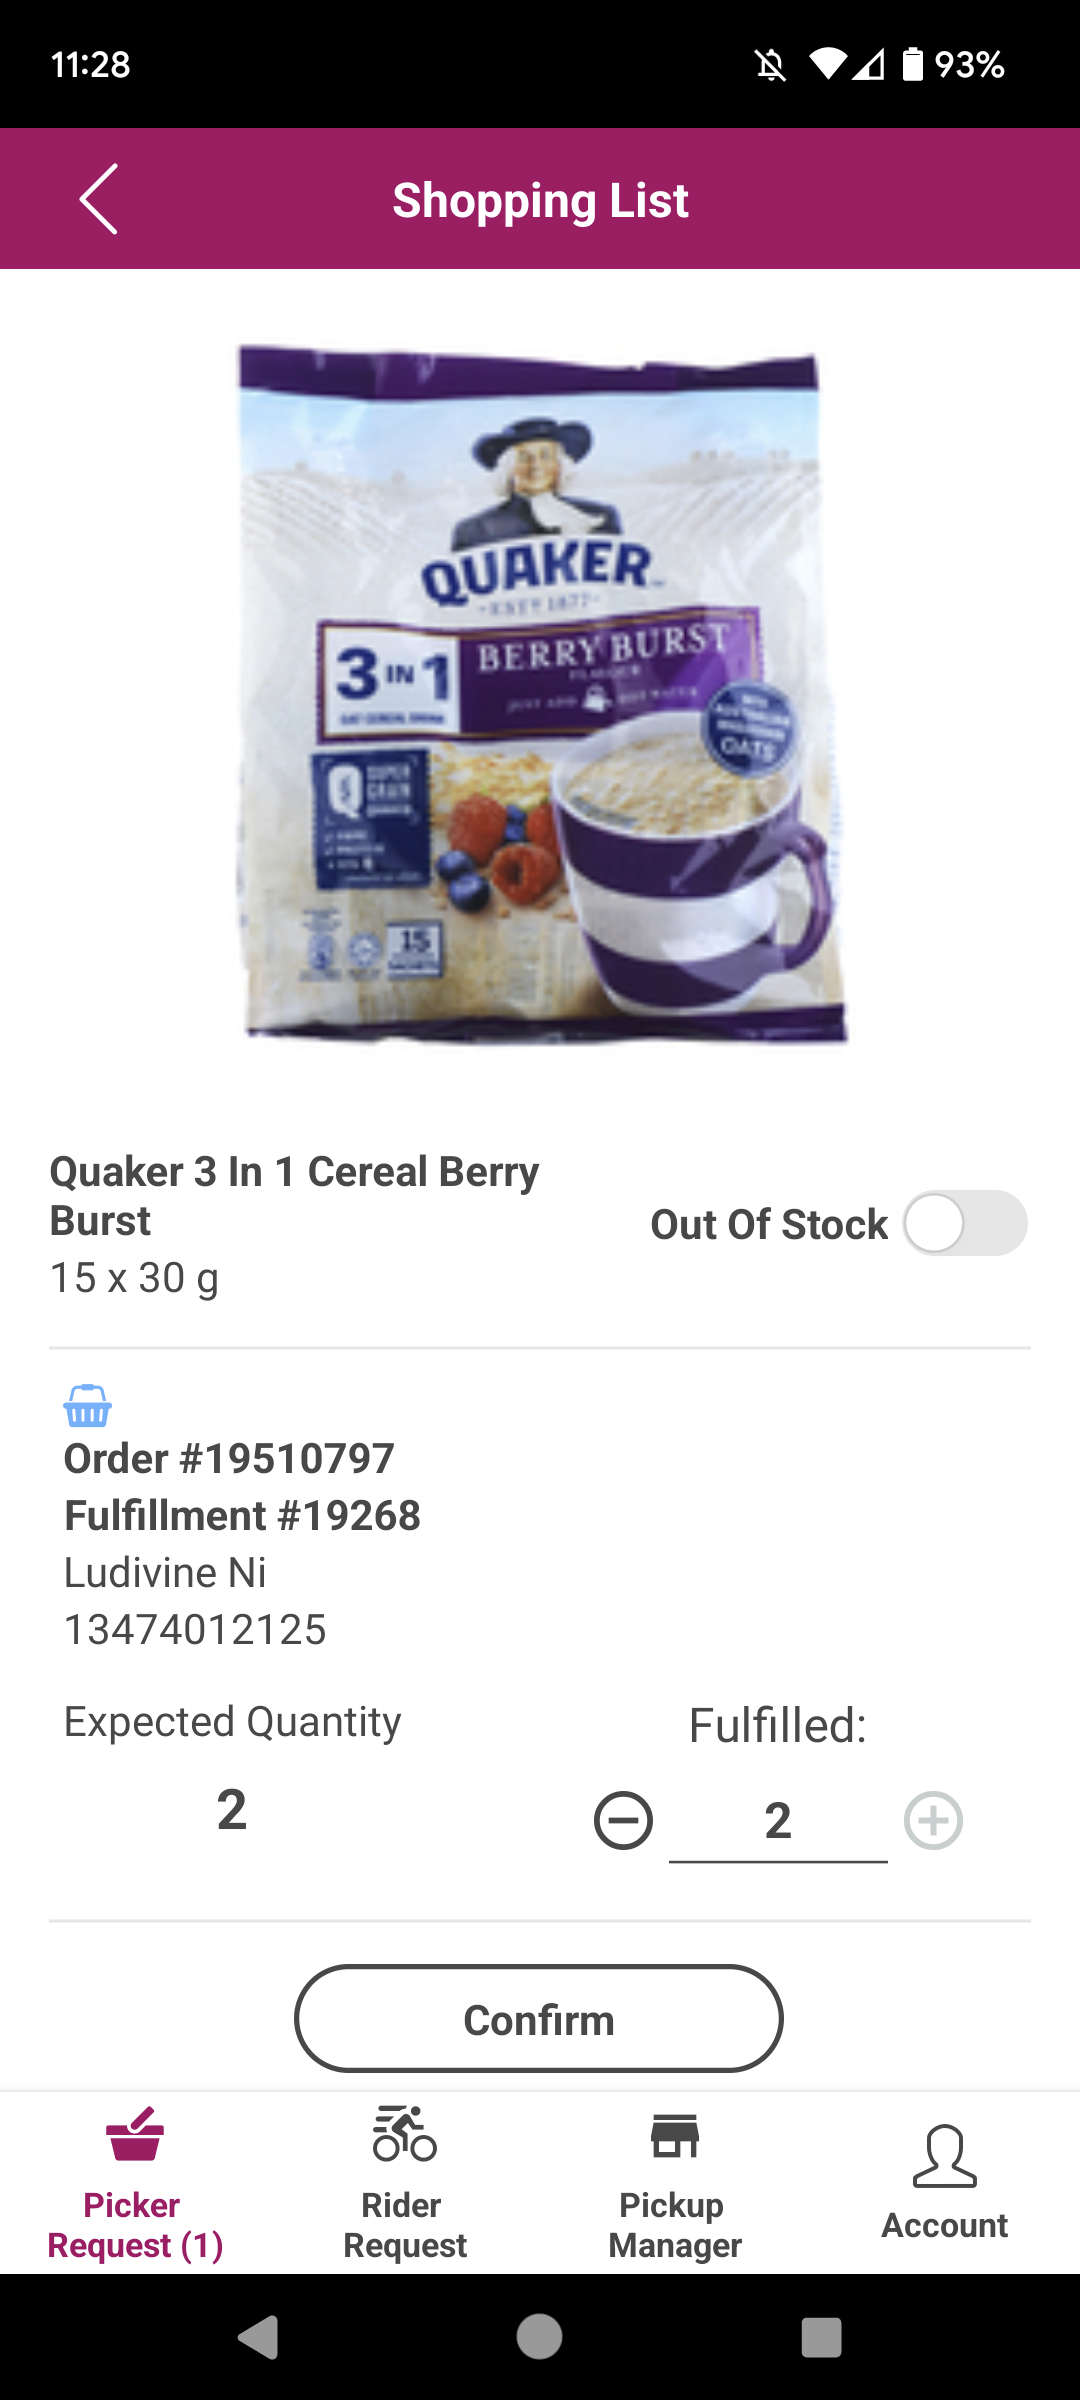
Tap on “Check Order” to view more details
- Larger item image
- Item name and extended name
- Store where the item is located
- Order information:
- Order number
- Fulfillment number
- Customer name
- Customer phone number
-
Fulfill items from the
In Progresssection and indicate the quantity fulfilled for each item-
Tap for a few seconds on an item image to automatically fulfill all the quantity ordered
- Alternatively, go to “Check Order”, enter the quantity fulfilled and tap “Confirm”
-
If the order is part of multiple orders, make sure to enter quantity fulfilled for each order
-
Fulfilled items will automatically move to the
Donesection at the bottom of the shopping list -
To mark fulfilled quantity as
0, go to “Check Order”, leave fulfilled as0and tap “Save” -
You can edit fulfilled quantity by tapping “Check Order”
-
Out of Stock toggle
-
On the “Check Order” screen, toggle “Out Of Stock” to adjust the item inventory to 0 and prevent customers from ordering it
-
Inventory will be updated with the next file ingestion or can be adjusted on the inventory page of Xpress Admin
📣 Warning: Toggling "Out of stock" is not reversible on the Picker app

📣 Replacements cannot be handled on the Shopper App
-
-
-
After all items are fulfilled, tap “Complete Shopping”, then tap “Complete Request” on the main screen
- This will set the orders’ statuses to
Complete Shopping
- This will set the orders’ statuses to
📣 Do not forget to tap “Complete Request” otherwise you will not be able to receive new assignments.
- Under
When all items in an order are out of stock, the order’s status will be updated toFailedinstead ofComplete Shopping. The order cannot be assigned to an internal rider or 3PL. The customer will receive a refund for the items.
Updated over 1 year ago